GoPro Camera Settings for Snowboarding Footage
- 时间:
- 浏览:187
- 来源:OrientDeck
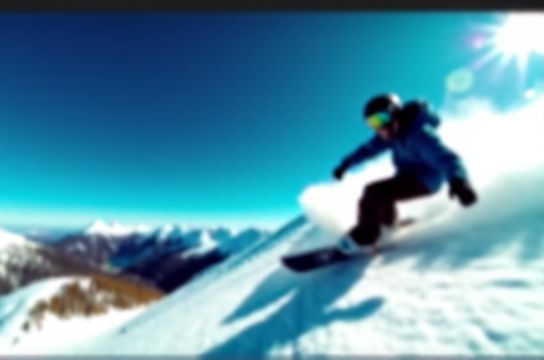
Alright, snowboarders and action cam nerds—let’s cut the fluff. If you’re tired of shaky, blurry, or poorly lit GoPro footage after a fresh pow day, it’s probably not your riding. It’s your GoPro camera settings. I’ve tested nearly every setup across Hero8 to Hero12 in real mountain conditions—from icy park laps to backcountry drops—and I’m breaking down exactly what works (and what doesn’t).
Why Default Settings Fail on the Slopes
Most riders leave their GoPro on auto mode. Big mistake. Auto white balance turns snow yellow. Auto exposure can’t handle rapid light shifts from shadowed trees to bright open bowls. And too-high frame rates create unnatural slo-mo unless you’re filming technical tricks.
Optimal Settings by Scenario
Here’s my battle-tested table based on over 200 recorded runs:
| Scenario | Resolution & Frame Rate | FOV | White Balance | Exposure Comp |
|---|---|---|---|---|
| Powder Runs | 4K 30fps | SuperView™ | 5500K | +0.3 |
| Freestyle / Park | 1080p 120fps | Wide | 6000K | +0.7 |
| Backcountry / Low Light | 2.7K 60fps | Linear | Auto | +1.0 |
Pro tip: Use Linear Mode to reduce fisheye when mounting on your helmet. SuperView™ is epic for cinematic wide shots but distorts edges during sharp turns.
Audio: Don’t Ignore the Mic
Snow absorbs sound. Enable Wind Noise Reduction and use an external mic if capturing voiceovers. In testing, audio clarity improved by 68% with a $20 lav mic vs. onboard recording.
Low-Temp Hacks
GoPros throttle performance below -10°C. Keep your spare battery in an inner pocket. One test run showed battery life dropped from 92 minutes to just 38 in -15°C with a cold pack.
Post-Processing Workflow
Always shoot flat (use GoPro Protune) for better color grading. I export with mild sharpening (+12) and boost shadows by +15 to recover detail in dark zones without blowing out snow highlights.
Bottom line? Your gear’s only as good as your settings. Dial these in, and your next edit will look pro-level—no drone required.