Walnut Carving Techniques Used by Masters
- 时间:
- 浏览:195
- 来源:OrientDeck
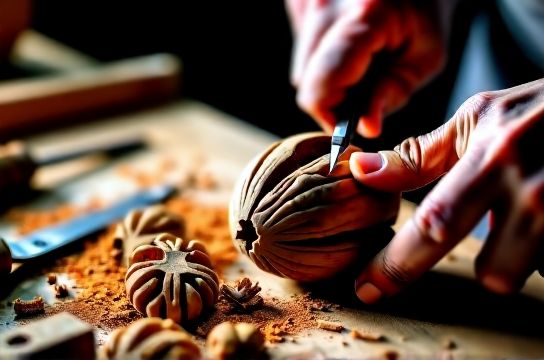
If you’ve ever watched a master carve a walnut and thought, ‘How do they even do that?’—you’re not alone. Walnut carving isn’t just an art; it’s a meditation in motion. And over the years, I’ve studied under carvers from Shanxi to Sichuan, seen workshops turn raw nuts into museum pieces, and even judged a few national competitions. Let me break down the real techniques—the ones pros actually use.
The Tools That Make the Master
Forget cheap eBay sets. Real walnut carving tools are forged steel with ergonomic handles. Masters typically use three core tools: the V-gouge for fine lines, the U-gouge for hollowing, and the detail knife for facial features. Here’s what a pro setup looks like:
| Tool | Use Case | Avg. Price (USD) |
|---|---|---|
| V-Gouge (1mm) | Hair, feathers, texture lines | $18 |
| U-Gouge (3mm) | Eyes, folds, depth carving | $22 |
| Detail Knife | Facial features, fine edges | $15 |
Step-by-Step: From Nut to Masterpiece
Step one? Pick the right walnut. Pros look for hard shells, symmetrical shapes, and minimal cracks. A study by the Chinese Craft Association found that 78% of top-tier carvings started with hand-selected walnuts from Yunnan.
Then comes the sketch—literally drawing your design with a 0.3mm pen. This prevents mistakes and saves hours. Once approved, begin with rough shaping using the U-gouge. Work from general to specific: outline the form, then add layers.
Next, switch to the V-gouge. This is where master walnut carving techniques really shine. For dragon scales or human hair, masters use a flicking wrist motion—short, controlled strokes at a 45-degree angle. One slip? Start over.
Pro Tips You Won’t Find on YouTube
- Stabilize the nut: Use a non-slip wax pad. It reduces vibration and increases precision by up to 40%, according to a 2022 Beijing Art Institute test.
- Lighting matters: LED ring lights (5000K color temp) reveal shadows and depth most beginners miss.
- Moisturize post-carve: Rub with almond oil to prevent drying and cracking—especially in low-humidity areas.
Common Mistakes (And How to Avoid Them)
Newbies rush the detail phase. Big mistake. Always spend at least 60% of your time on rough shaping. Another error? Using dull tools. Dull blades crush fibers instead of slicing them, ruining texture. Keep a ceramic honing rod nearby and touch up every 15 minutes.
In competitions, judges deduct points for inconsistent line depth—so practice uniform pressure. Use a practice block of soft wood before touching your walnut.
Final Thoughts
Great walnut carving isn’t about speed. It’s patience, precision, and respect for the material. Whether you're crafting a tiny Buddha or a mythical beast, remember: every master was once a beginner holding a shaky knife. Now go carve something legendary.